Tuesday, July 28, 2015

Yafawi Sfeeha

This month we were given a challenge that I had never heard of before. It's a Palestinian dish called Yafawi Sfeeha. Although it looks challenging to make, I found it easier than I thought it would be. And it is worth every minute you spend on it, especially if eaten warm!
The Sfeeha has a flaky texture. It's very soft and delicious. I loved the hint of mint that came out with the warm feta cheese. 

We were given three options for the filling: a lamb/beef, a hard cheese (feta), or a sweet walnut. As some of my audience is vegetarian, I opted for the feta and paired it with some mint. (Yum!)

When making the dough, you can add more flavor and texture of you use ghee. It's not hard to make and doesn't need to be refigerated. (See Alton Brown's recipe: http://www.foodnetwork.com/recipes/alton-brown/ghee-recipe.html)


Ingredients:

To make the dough:

3 cups (750 ml) (420 gm) (15 oz) all-purpose (plain) flour, scoop flour using cup measure then level

1 teaspoon (5 ml) (6 gm) salt

1 tablespoon (15 ml) (15 gm) (½ oz) sugar

3 tablespoons (45 ml) powdered milk (you can substitute this with warm milk, you will need less water if using milk)

3 tablespoons (45 ml) vegetable oil
About 1 cup (250 ml) warm water for kneading
Melted ghee (or olive oil) to stretch the dough (ghee gives a great texture and flavor).

Directions:

1.Mix flour, salt, sugar, powdered milk and vegetable oil then start adding the warm water until you get a tender and slightly sticky dough. Kneading will take about 8 min on a stand-up mixer or 12 min by hand. you might need more depending on where you live and the kind of flour you are using).

2.Form the dough into small golf-ball-sized balls. Place on a baking sheet that is very well greased with ghee or olive oil and pour some more (oil or ghee) over dough. Cover and let rest at room temperature for few hours at least (or overnight).

3.Prepare filling in the meantime.

4.After you have your filling ready, use some of the ghee to brush a round tray (the surface that you will be working on). Take one piece of dough and using your hands, gently start spreading it as thinly and evenly as possible. (It was actually pretty easy to spread- I thought it would be harder.)


  1. Once that is done fold the upper side to the middle, then fold the opposite side to the middle as well.


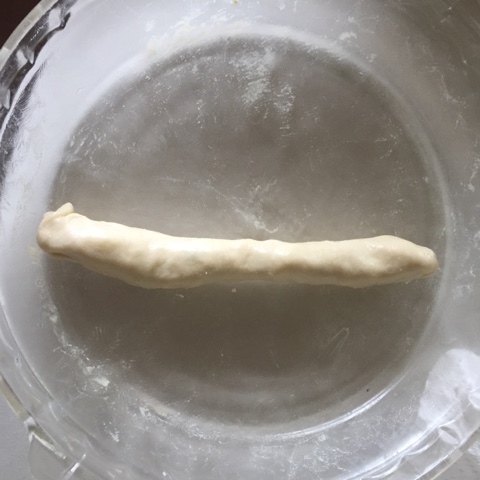
    6. Spread your filling in a long line across the dough. Roll like a long tight rope making sure that it is tight enough to ensure no filling escapes. Then taking one end start rolling the rope towards the inside in a spiral shape (see photo). 
    (Note: I used a different Sfeeha for the next few pictures.)


    1. Put some more ghee on your baking sheet and place the done Sfeeha onto the baking sheet. Continue making the rest of your Sfeeha using ghee to keep it nice and moist. (Mine made about 16 and I had a little filling left.)

    1. Preheat oven to moderately hot 400°F/200°C/gas mark 6 and bake Sfeeha for 15-20 minutes till golden brown. Serve hot or at room temperature with a bowl of soup during winter or a salad and Greek yogurt in summer time.
    Cheese Filling:

    Ingredients:

    3-4 cups Nabulsi cheese, crumbled (You can use feta or Halloumi if you like but you need a reasonably hard and salty white cheese.) (I used feta and mint.) 

    ½ cup Italian parsley, minced (you can use fresh mint or fresh za’tar)

    1 egg, beaten

    Black pepper

    Directions:

    Mix ingredients and your cheese filling is ready.


    It's worth the time for this recipe. It was a hit with my family- even my nephew liked it. I will be making it again in the future.

    For the link to the Sfeeha recipe (and the other filling options) go to:

    http://www.thedaringkitchen.com/recipe/yafawi-sfeeha

    Happy Baking Adventures Everyone!
    -Brooke


Friday, July 3, 2015

Charlotte Russe


This month's Daring bakers' challenge was to create either a Charlottle Royale or a Charlottle Russe. The latter was my choice, and it turned out to be a delicious creation!

There is a layer of cake at the bottom, and the treat is surrounded by ladyfingers. On the inside there is a Bavarian cream followed by a rhubarb mousse and a rhubarb glaze. 

I really liked working with the rhubarb! The sugar sweetened it, but it still added some tanginess. (I can't wait to do more with it!)

There are all sorts of variations that you can create! While it was a little bit of work, the end result was a light and delicate dessert. It would work well for a special event. 
My husband especially enjoyed this. He doesn't eat many sweets, so this was a special treat! 

For the cake and Bavarian cream recipes, go to: http://www.thedaringkitchen.com/recipe/charlottes


(I used cream cheese instead of the mascarpone in mine.)


Wednesday, May 27, 2015

Lamingtons


Lamingtons were the challenge for the Daring Bakers in May.
 This is a treat from Australia/New Zealand. Traditionally, a sponge cake is cut, dipped in chocolate and then rolled in finely shredded coconut. 

And then are soo delicious!
 
I will have to make these again.

Lamingtons can also be made with pound or butter cake (probably others as well so long as they can hold their shape). Since my sponge cake did not turn out, (I will have to keep working on that one) I used a butter cake for this challenge.

They are also open to creativity - there are so many variations that you could create! When I ran out of coconut, I decided to experiment with crushed graham cracker instead. 
Although good, the traditional coconut was my favorite.


Happy baking! Let me know if you decide to try lamingtons or any variation of them! There's nothing like a good baking challenge- it's a great way to expand your knowledge. :)

For a recipe, go to http://www.thedaringkitchen.com/recipe/lamingtons

Also, if you are in the United States, it seems that her Corn Starch is not the same as our yellow corn starch. You may need a different recipe. 
For the butter cake recipe I used, go to 

Monday, April 27, 2015

Focaccia!

This month was my first opportunity to participate in a Daring Bakers challenge! The challenge centered around Focaccia. 

(Aside from learning how to make this bread, I also had to learn how to say it's name.)


I choose a traditional recipe to follow: I think my favorite part is all the herbs in the dough and the flavor it adds! It was a hit with my husband! And while it may not have turned out perfectly, it certainly was delicious.

(Recipe from The Daring Kitchen
http://www.thedaringkitchen.com/recipe/focaccia)

Ingredients

2-3/4 cups (660 ml) (385 gm) (13½ oz) all-purpose (plain) flour

1 teaspoon (5 ml) (6 gm) salt

1 teaspoon (5 ml) (5 gm) white sugar

1 tablespoon (15 ml) (8½ gm) active dry yeast

1 teaspoon (5 ml) (3 gm) garlic powder

1 teaspoon (5 ml) (3 gm) dried oregano

1 teaspoon (5 ml) (3 gm) dried thyme

1/2 teaspoon dried basil

1 pinch ground black pepper

1 tablespoon (15 ml) vegetable oil

1¼ cups (300 ml) milk (you may need up to 1½ cups (360 ml))

2 tablespoon (30 ml) (15 gm) (½ oz) grated Parmesan cheese (optional)

For the topping

Your choice- I used mozzarella cheese and sliced tomatoes (if you use tomatoes, make sure to let them dry out a bit).

Directions

In a bowl mix the milk, yeast and sugar and wait until it becomes foamy and bubbly (This indicates that your yeast is active, if the yeast doesn’t bubble and foam it has gone bad and you can’t use it)

In a large bowl, stir together the flour, salt, garlic powder, oregano, thyme, basil, 1 tablespoon (15 ml) (7 gm) (¼ oz) parmesan cheese and black pepper.

Mix in the vegetable oil, then add the milk-yeast mixture.

Stir with a wooden spoon till the dough has pulled together, turn it out onto a lightly floured surface, and knead until smooth and elastic (around 10 minutes).


Lightly oil a large bowl, place the dough in the bowl, and turn to coat with oil.

Cover with a damp cloth, and let rise in a warm place until it doubles in size. (If you are tight on time you could heat your oven to moderate 350°F/180°C/gas mark 4 then turn it off and place the bowl with the dough in it)


(Mine rose quite a bit here- I would recommend stopping it a bit sooner.)

Center your oven rack, preheat oven to hot 450°F/230°C/gas mark 8.

Punch dough down; place on greased baking sheet. Pat into a ½ -inch (15 mm) thick rectangle or any shape you desire.

To give the dough the dimples effect, use your fingertips , pushing gently all over the surface of the dough.


Place your selected toppings. 

Allow the dough to rest for 10-15 minutes

Bake in preheated hot 450°F/230°C/gas mark 8 oven for 15 minutes, or until the sides begin to brown then place under the broiler (grill) till the top becomes golden brown.

Serve warm. 


Monday, March 2, 2015

Entremet

Ever since I watched the semi final episode of the Great British Baking Show, I've been intrigued and curious about making an Entremet. When one of the judges said that it was at the high-end of patisserie, I determined that I want to make it. All week I researched different ways to make them, and brainstormed flavor ideas. 

Some friends and I had a girls night planned for later in the week, and I figured this would be a good opportunity to try making this fun treat. On the Saturday that I made it, my sweet husband took our little boy and played with him for most of the day. I spent my time making the various components of the entremet. While it turned out pretty well and was very delicious, I'm excited to experiment with it more in the future. I had a blast making! It is so much fun to learn to make new things. :-)
The bottom layer is a vanilla genoise sponge cake, followed by a vanilla coconut creme mousseline, another layer of sponge, a chocolate mousse, and then topped with a homemade layer of marzipan and spun sugar. (I had a lot of fun experimenting with the spun sugar.) 
Most of the recipes I used came from the book Perfect Patisserie, by Tim Kinnaird. 

The next time I make this, I will probably do it more than one day in advance. (Most of the components can be made ahead of time.) This is definitely a treat I recommend making!